
Thanks to the Public Tenant API hosted on public services tier, the tenants can use PowerShell to manage Virtual Networks, Virtual Machines, Web sites and so on. In this topic I will explain how to run PowerShell commands across the public tenant API.
Verify the Public Tenant API site configuration
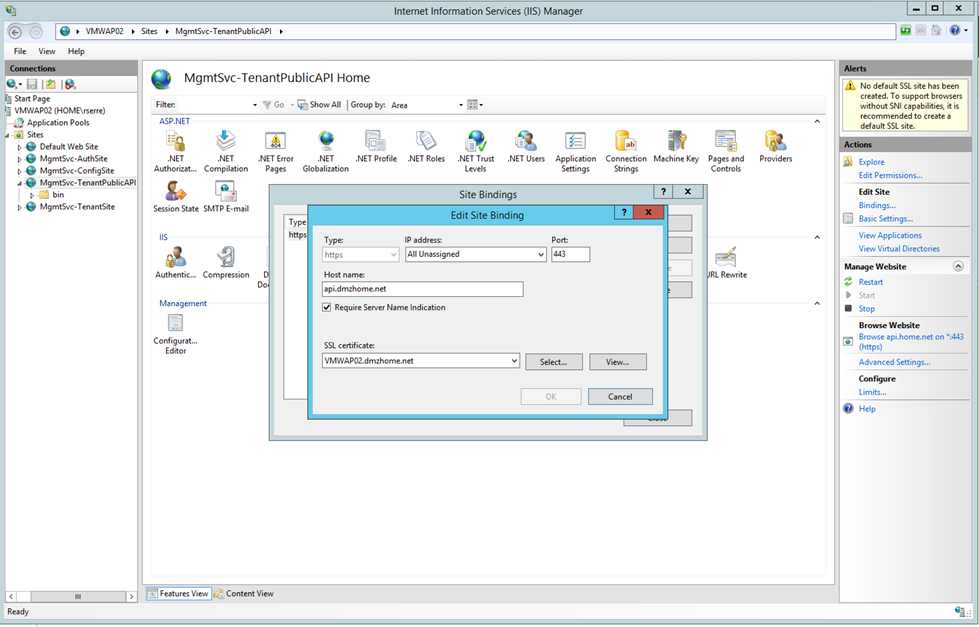
To follow this topic, you must have a working Windows Azure Pack installation (cf. this topic). Verify also that your Tenant Public API is well configured. For that connect to servers that host this service en verify the configuration in IIS. Ideally, a certificate signed by a PKI should be assigned to the service and a host name should be provided.
In my example I will use the below aliases:
| WAP Role |
DNS Alias |
Target |
| Public Tenant API |
api.dmzhome.net |
VMWAP01, VMWAP02 |
| Tenant Site |
www.dmzhome.net |
VMWAP01, VMWAP02 |
| Tenant auth site |
auth.dmzhome.net |
VMWAP01, VMWAP02 |
| Tenant API |
tapi.home.net |
VMWAP03, VMWAP04 |
| Admin API |
aapi.home.net |
VMWAP03, VMWAP04 |
| Admin Auth Site |
auth.home.net |
VMSFS01 |
| Admin Site |
admin.home.net |
VMWAP03, VMWAP04 |
To finish, make sure that you have run the below script to reconfigure the Tenant Public API endpoint:
Import-Module MgmtSvcAdmin
### VARIABLES
## Environment settings
# SQL Server AlwaysOn DNS Listener containing the Windows Azure Pack databases
$server="SQLAAG02.home.net"

## Define the desired FQDNs and Ports
# Tenant Site
$TenantSiteLB ="www.DMZHome.net"
$TenantSitePort = "443"
# Tenant Auth Site
$TenantAuthSiteLB ="auth.DMZHome.net"
$TenantAuthSitePort = "443"
# Tenant Public API
$TenantPublicApiLB = "api.DMZhome.net"
$TenantPublicApiPort = "443"

### MAIN CODE
# Define the federation endpoints
$TenantMetadataEndpoint="https://${TenantAuthSiteLB}:$AuthSitePort/federationMetaData/2007-06/FederationMetadata.xml"
$TenantSiteMetadataEndpoint="https://${TenantSiteLB}:$TenantSitePort/federationMetaData/2007-06/FederationMetadata.xml"

# Reconfigure Windows Azure Pack components to point to load balancers
Set-MgmtSvcFqdn -Namespace TenantPublicApi -FQDN $TenantPublicApiLB -Port $TenantPublicApiPort -Server $server
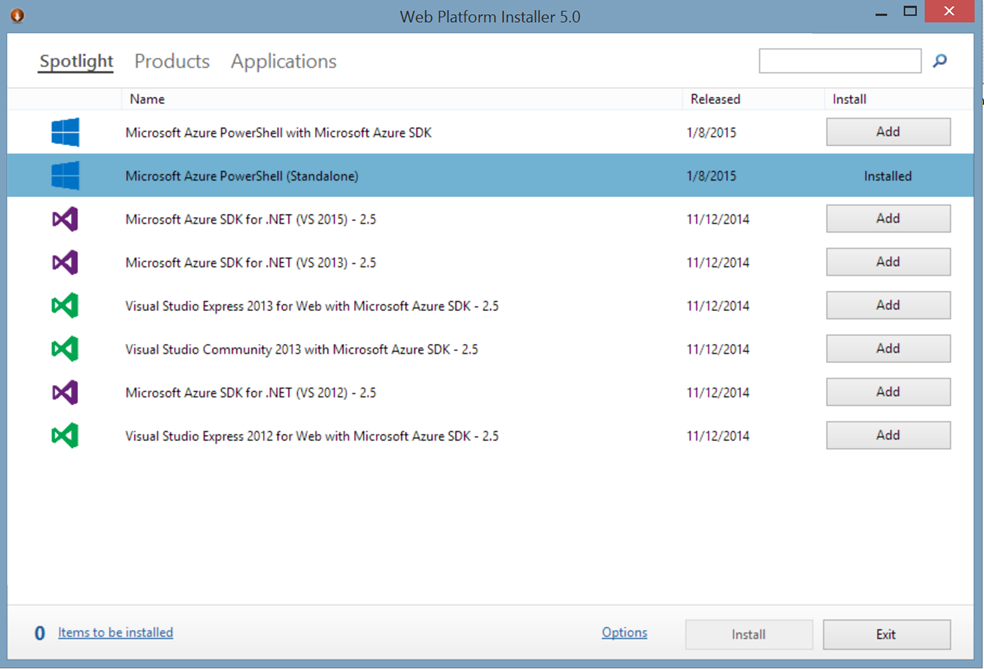
Install Microsoft Azure PowerShell module
First, run the Web Plateform Installer on the machine where you want run WAPack PowerShell command and install Microsoft Azure PowerShell.
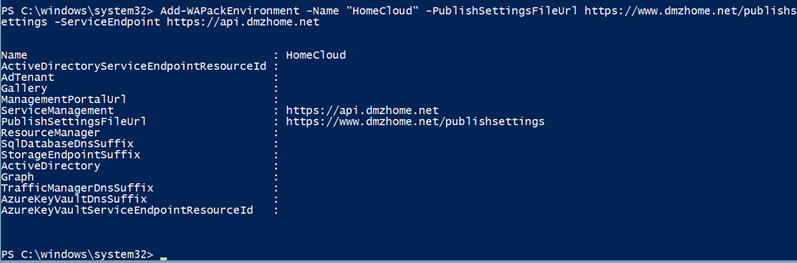
Configure environment
Open a PowerShell command line in Administrator and run the below command.
Add-WAPackEnvironment -Name "<Give-a-Name>" `
                      -PublishSettingsFileUrl https://<URL-to-Tenant-Portal>/publishsettings `
                      -ServiceEndpoint https://<URL-to-Tenant-Public-API>
Next run the below command with the same name that you have provided in the Add-WAPackEnvironment command. Then download the file publishsettings file.
Get-WAPackPublishSettingsFile -Environment "<Give-a-Name>"
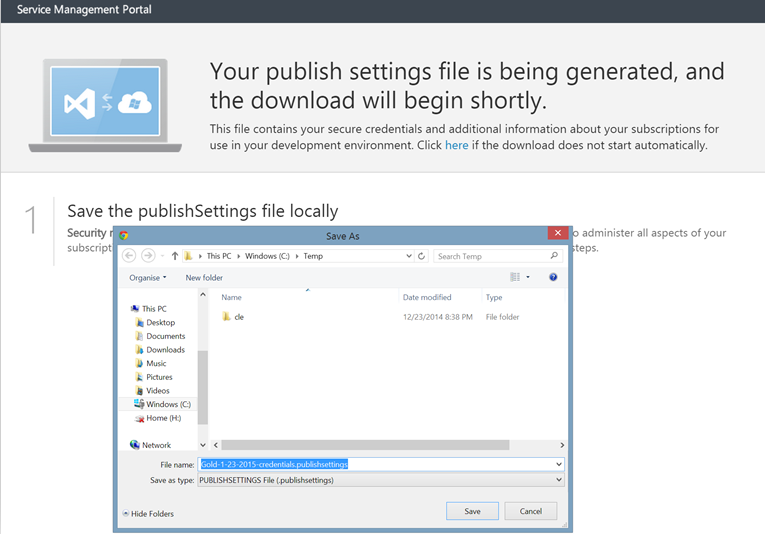
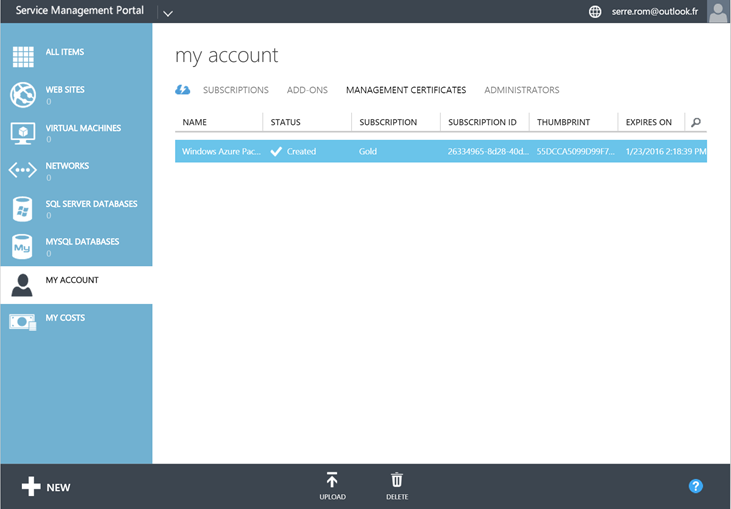
When you have downloaded the file, a certificate is added to management certificates in My Account.
Next go back to the PowerShell command line, and run the below command.
Import-WAPackPublishSettingsFile "<Path-to-the-publishsettings-file>" -Environment "<Give-a-Name>"

Example 1: Create a Virtual Network
In this example, my tenant can only create virtual network from Hyper-V Network Virtualization. So I have to find the provider logical network to create virtual network. For that I run the below PowerShell command:
Get-WAPackLogicalNetwork
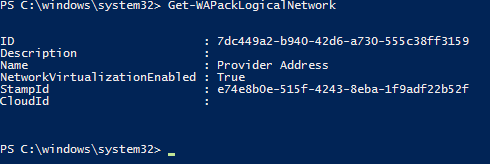
Now that I have the name of the Provider Address network, I can use it to create a Virtual Network with these commands.
$LogicalNetwork = Get-WAPAckLogicalNetwork -Name "Provider Address"
New-WAPackVNet -Description "Virtual Network 1" `
               -Name "vNet01" `
               -LogicalNetwork $LogicalNetwork
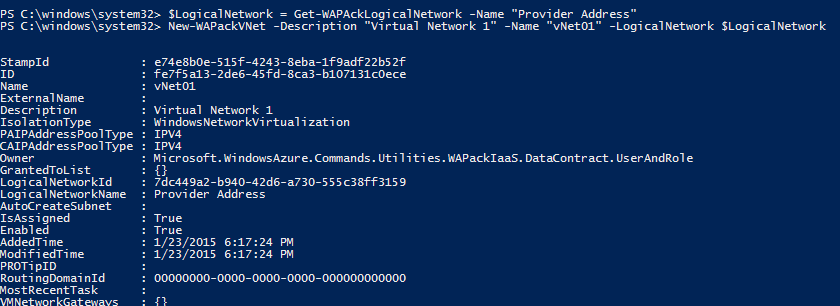
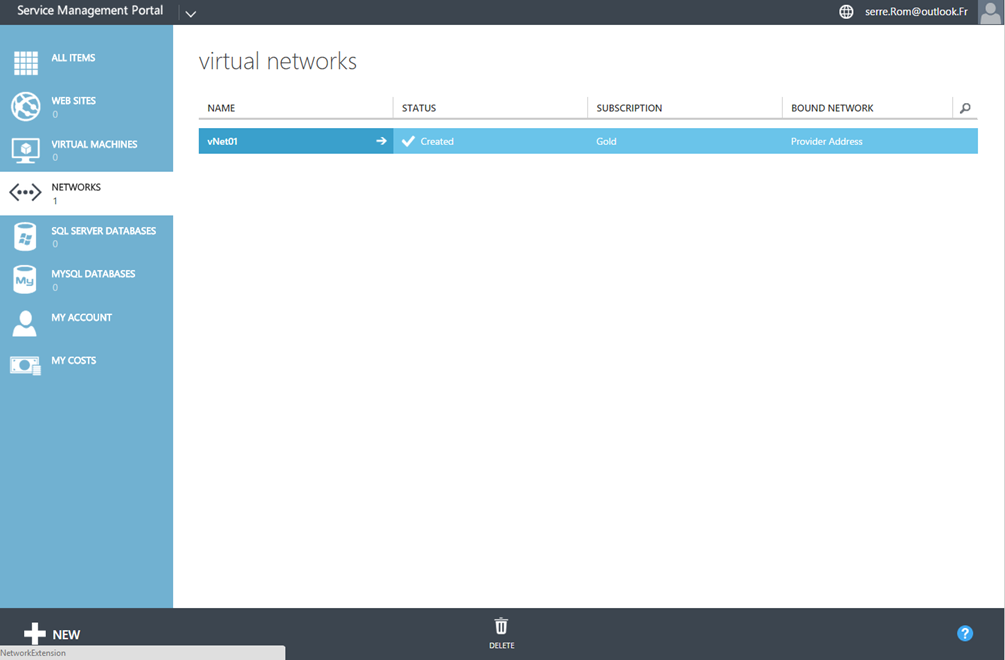
With the above commands, I have created a virtual network called vNet01. If I connect to the Windows Azure Pack portal, I can retrieve it:
Now that the virtual network is created, I have to create the subnet:
$vNet = Get-WAPackVNet -Name "vNet01"
New-WAPAckVMSubnet -Name "VMSubnet01" `
                   -Subnet "10.10.0.0/24" `
                   -VNet $vNet
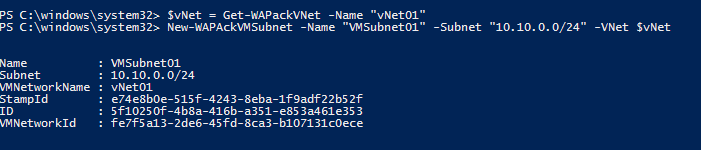
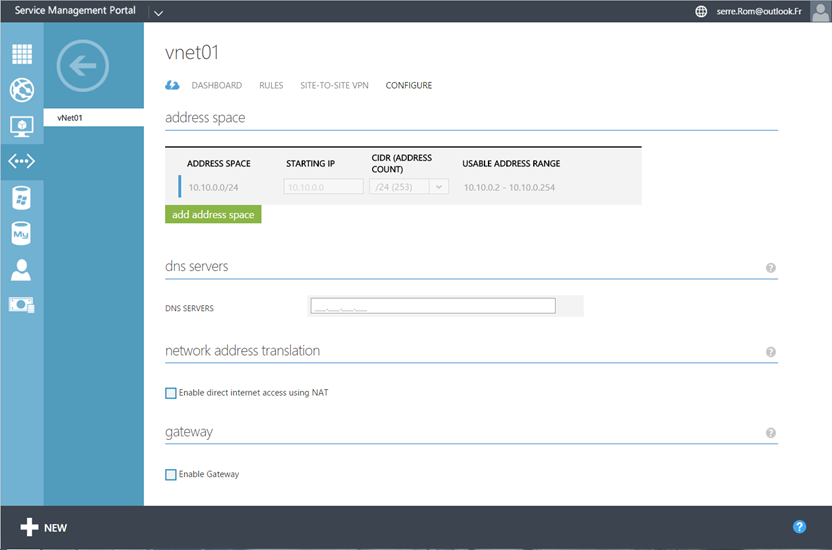
And if I come back to the Windows Azure Pack portal, I can see that the subnet is created:
To finish, I create a Static IP Address Pool:
$VMSubnet = Get-WAPackVMSubnet -Name "VMSubnet01" -vNet $Vnet
New-WAPackStaticIpAddressPool -IPAddressRangeStart "10.10.0.5" `
                              –IPAddressRangeEnd "10.10.0.250" `
                              -Name "IPP_VMSubnet01" `
                              –VMSubnet $VMSubnet
To finish, I delete the virtual network by running the below command:
$Vnet = Get-WAPackVNet vNet01
Remove-WAPackVNet $vNet
Example 2: Create a Virtual Machine
It is also possible to create virtual machines from PowerShell in Windows Azure Pack. You can create the virtual machines from template (Linux or Windows) or from OSDisk. I have chosen to create the VM from a Windows template:
# Get the VM Template
$StdPerfVMTemplate = Get-WAPackVMTemplate -Name "Standard Performance"
#Get Credential
$cred = Get-Credential
# Create VM
New-WAPackVM -Name "VMWEB01" -Template $StdPerfVMTemplate `
                             -Vnet $vNet `
                             -VMCredential $Cred `
                             -Windows `
                             -ProductKey "Y4TGP-NPTV9-HTC2H-7MGQ3-DV4TW"
Once the VM is created, you can retrieve it in the Windows Azure Pack portal.
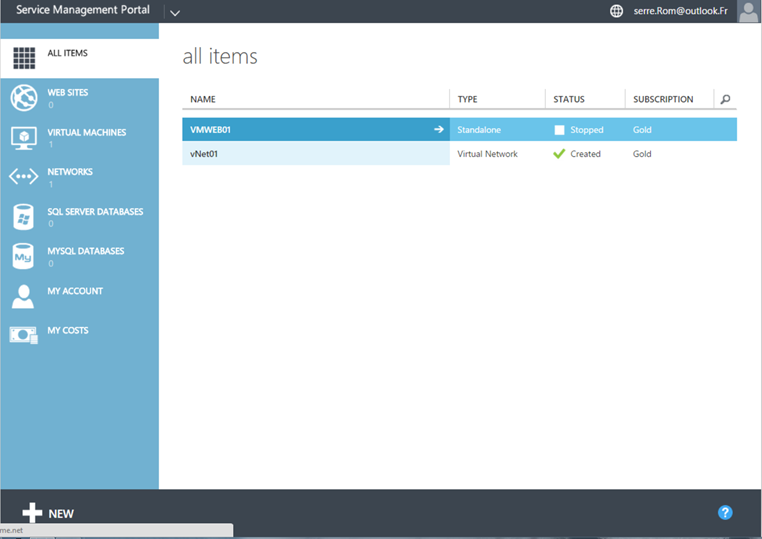
You can also run the below command to obtain the state of the Virtual Machine

To start, stop and remove the VM you can run the below PowerShell commands:
$VM = Get-WAPackVM VMWEB01
start-WAPAckVM $VM
stop-WAPAckVM $VM
Remove-WAPackVM $VM


