
The VM Role enables to deploy Virtual Machines with a predefined role as Domain Controller, Web Server, Exchange and so on. When deploying VM role from the gallery, the configuration of the related role is made automatically. Usually two packages are needed to deploy a VM role (resource extension package is optional):
- A resource definition package (*.resdefpkg). This is a template that describes information asked to the tenants from the Self-Portal as VM size, VM Name, forest name and so on. These parameters are used by VMM to deploy the VM Role.
- A resource extension package (*.resextpkg). This is a package that can contain two components:
- The Resource extension file (RESEXT): this is a template that describes how to deploy and configure the resource. Input parameters come from the resource definition.
- The application payload: contains required resources to deploy the application (IIS, Exchange and so on). The resources can be binaries, scripts etc.
So the resource definitions is added to the Windows Azure Pack and the resource extension is added to Virtual Machine Manager. The resource definition or extension package can be browsed if you replace the file extension by .zip. So in this way, you can add easily application payload for example.
In this topic, I will add the Domain Controller VM role to the gallery.
Requirements
To follow this topic you need the below requirements:
- A working Windows Azure Pack (cf. this topic);
- A Working VM Clouds configuration (cf. this topic);
- A sysprep VHDX made from a Gen1 Virtual Machine (cf. this topic).
Download gallery resources
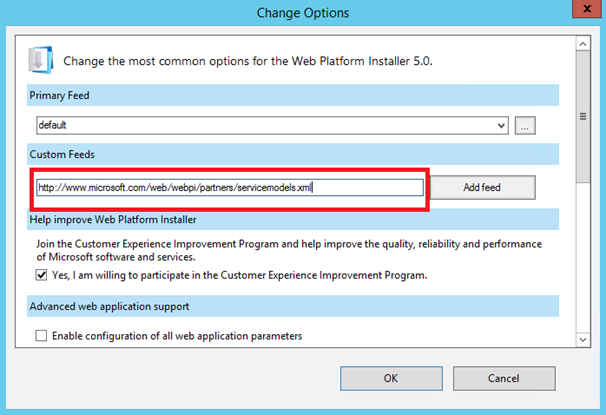
Some pre-configured gallery resources are available from Web Plateform Installer. First you have to download and install it. Once you have started Web Plateform Installer, click on options. Add this feed:
Once you have added this feed, another tab is available:
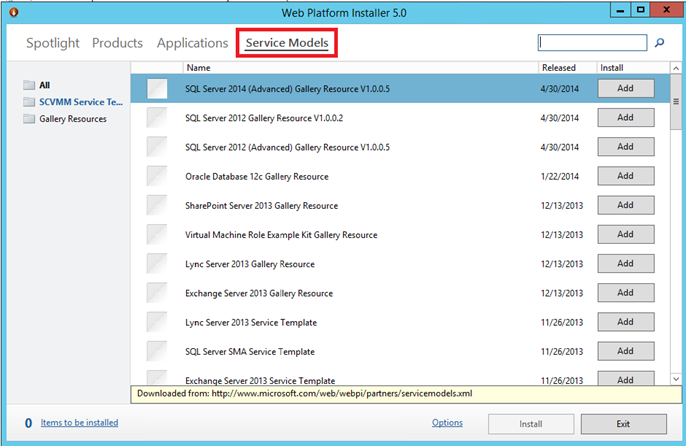
Next click on Gallery Resources, and select Domain Controller – Windows Server 2012 Gallery Resource. Then click on install.
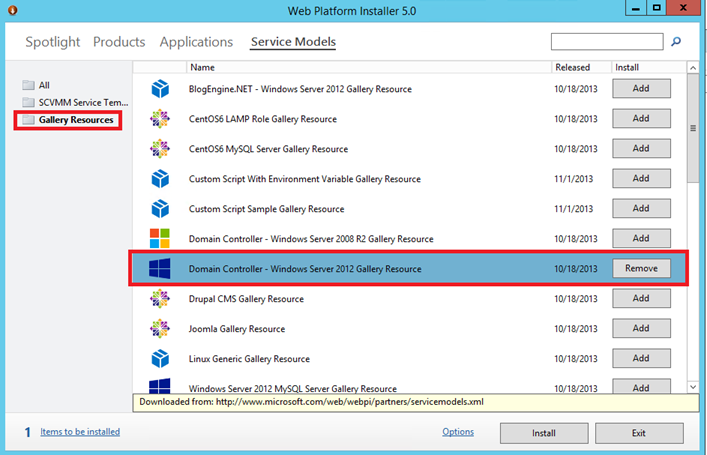
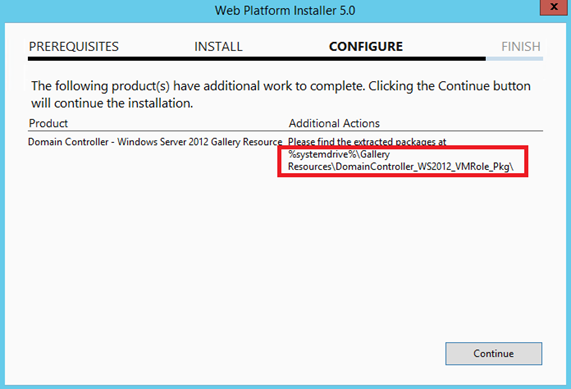
Once the download is finished, Web Plateform Installer should indicate the path to resource file. In this folder there are the resource definition and resource extension packages.
VMM configuration
Now that resource packages are downloaded, we will add the resource extension to VMM. For that, use the below script:
## Specify your library share name
$LibraryShareName = "VMMLibrary$"
## Specify the path to resextpkg file
$resextpkg = "C:\Gallery Resources\WS2012_MySQL_VMRole_Pkg\MySQLServerWindows.resextpkg"
$Library = Get-SCLibraryShare | Where-Object {$_.Name -eq $LibraryShareName}
Import-CloudResourceExtension -ResourceExtensionPath $resextpkg -SharePath $Library -AllowUnencryptedTransfer
Get-CloudResourceExtension
Once the resource extensions are added to VMM, we have to set parameters of the sysprep VHDX. If you read the documentation of the resource gallery you have this table:
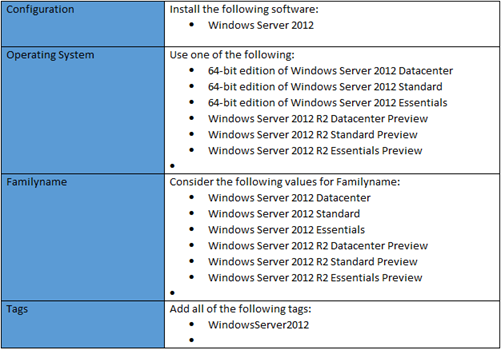
If the VHDX has not these settings, it will be unavailable when you will create the VM role. To set VHDX parameters, you can use the below script:
## Specify your VHDX file name
$VHDName = "Gen1-W2012R2"
$FamilyName = "Windows Server 2012 DataCenter"
$Release = "1.0.0.0"
$Tags = "WindowsServer2012"
$AVMAKey = "Y4TGP-NPTV9-HTC2H-7MGQ3-DV4TW"
$MyVHDX = Get-SCVirtualHardDisk | where {$_.Name –eq $VHDName}
$2K12DC = Get-SCOperatingSystem | where { $_.name –eq '64-bit edition of Windows Server 2012 Datacenter'}
$oTags = $myVHDX.Tag
if ( $otags -cnotcontains $Tags ) { $otags += @($Tags) }
Set-scvirtualharddisk –virtualharddisk $myVHDX `
                      –OperatingSystem $2K12DC `
                      -FamilyName $FamilyName `
                      -Release $Release `
                      -Tag $oTags `
                      -ProductKey $AVMAKey
NB: I have added the AVMA key as setting. It is because some gallery resources don’t manage the product key. In this case the OS preparation can be blocked on product key screen.
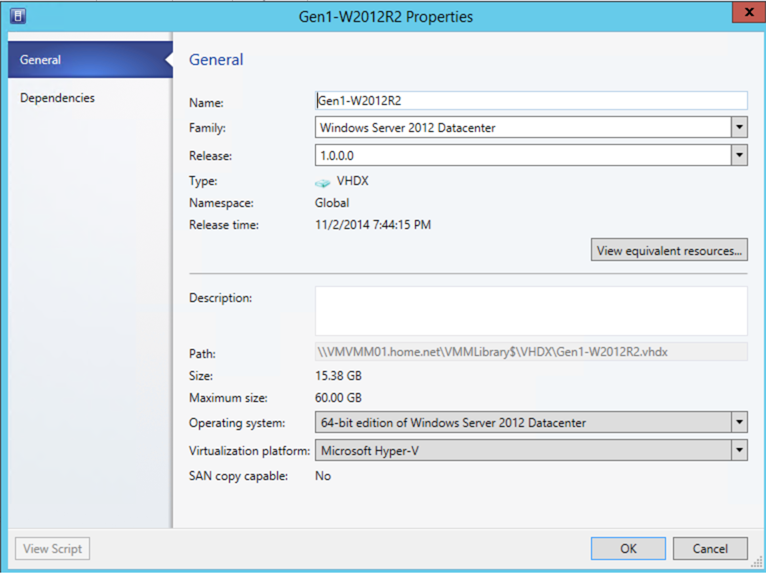
Once you have set parameters of your VHDX, you should have something similar as below. The tags are not manageable from VMM graphical interface. This is why the tags don’t appear in the VHDX properties.
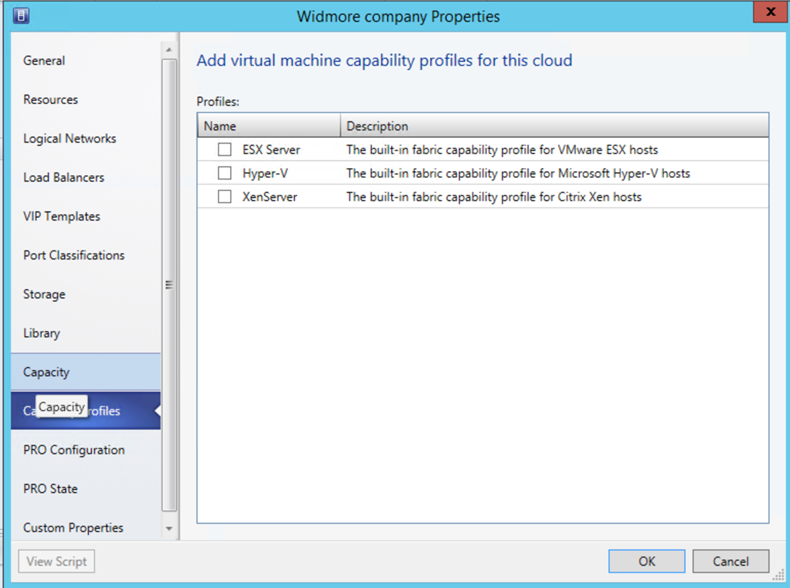
To finish, be sure that no profile is selected in capability profiles tab in Cloud settings. In the case of a profile is selected, the VM role deployment will fail (cf. this Microsoft KB). Disabling all profiles enables deployment on any hypervisor.
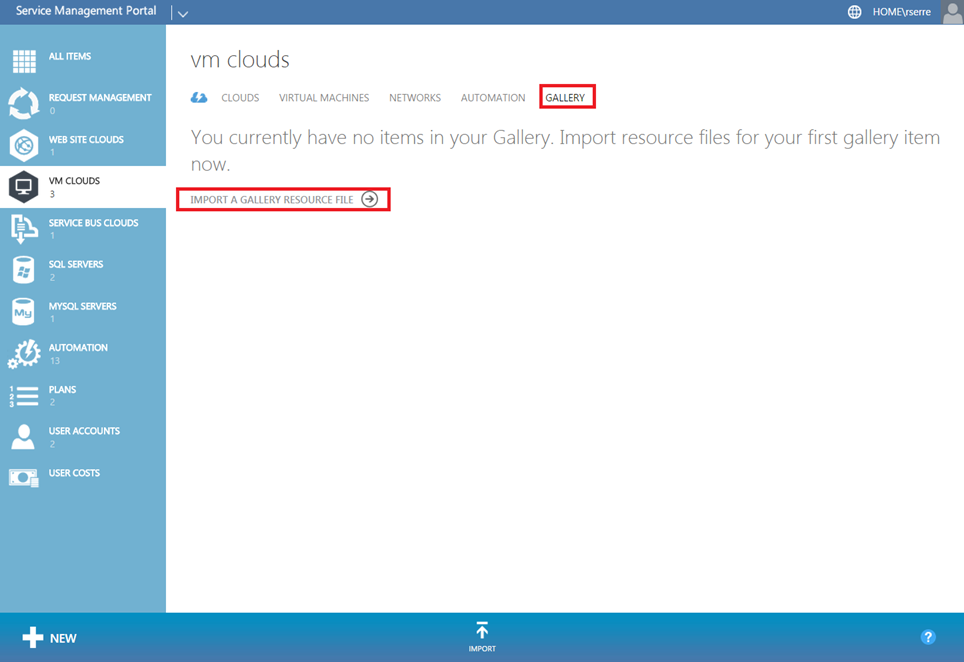
Add items to the VM gallery
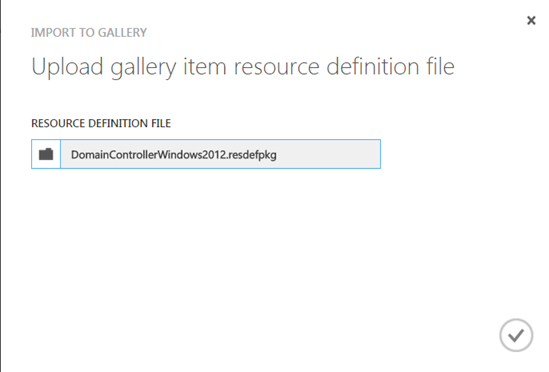
Now we will add the resource definition to the Windows Azure Pack. So open the administrative management portal and navigate to VM Clouds. Navigate to Gallery tab. Then click on Import a gallery resource file.
Select the resdefpkg file and click on OK.
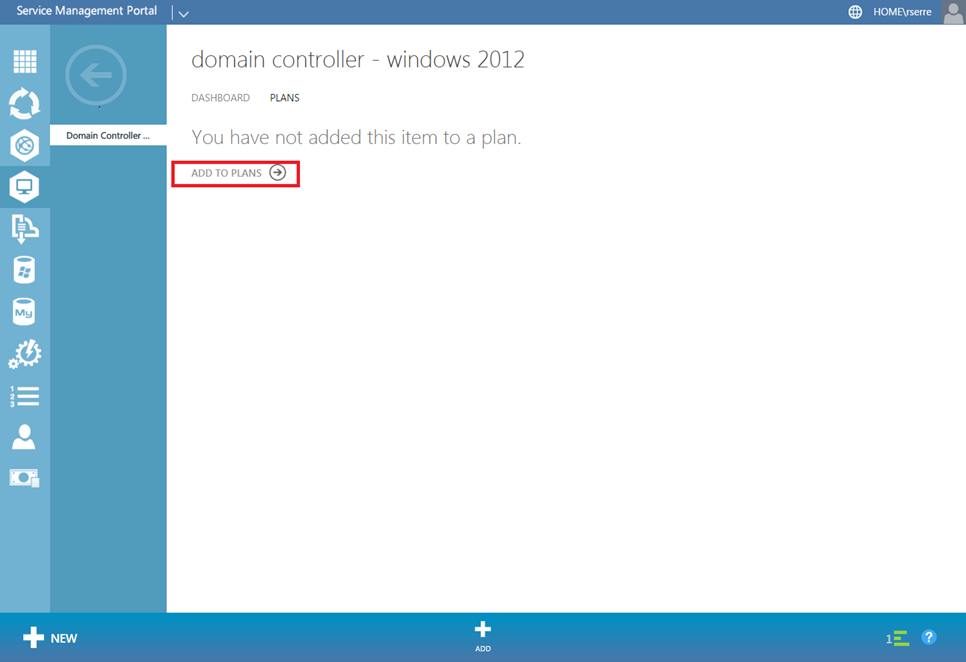
Once you have added the resource definition file, select it. Next navigate to Plans tab and click on Add to a plan.
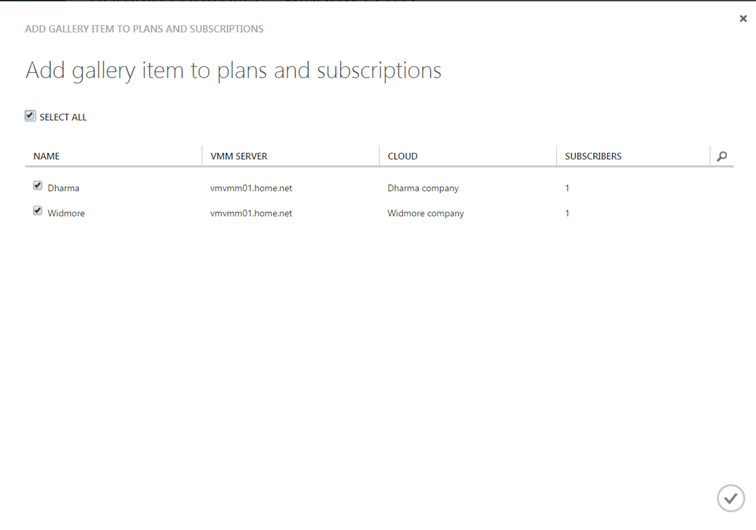
Select hosting plans where the VM role will be available for your tenants.
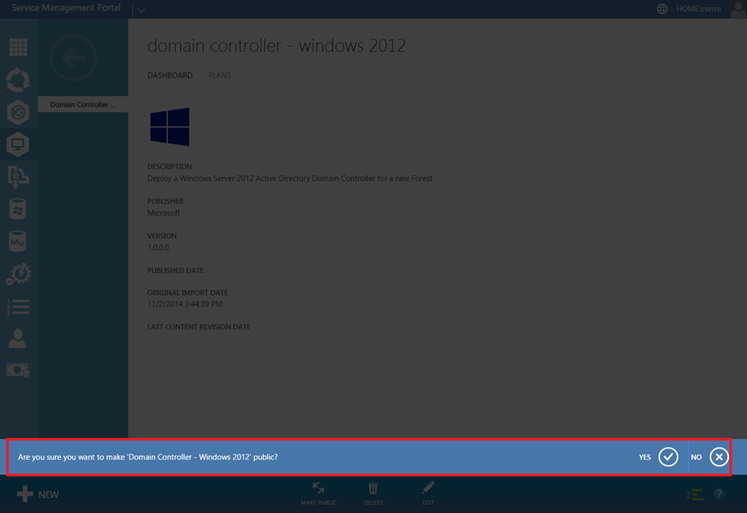
To finish, go back to the dashboard tab. Click on Mark Public and select yes.
Deploy a VM role
Now that the VM Role is available in the gallery, let’s try to use it. So open the tenant management portal and add a new Virtual Machine Role
from gallery.
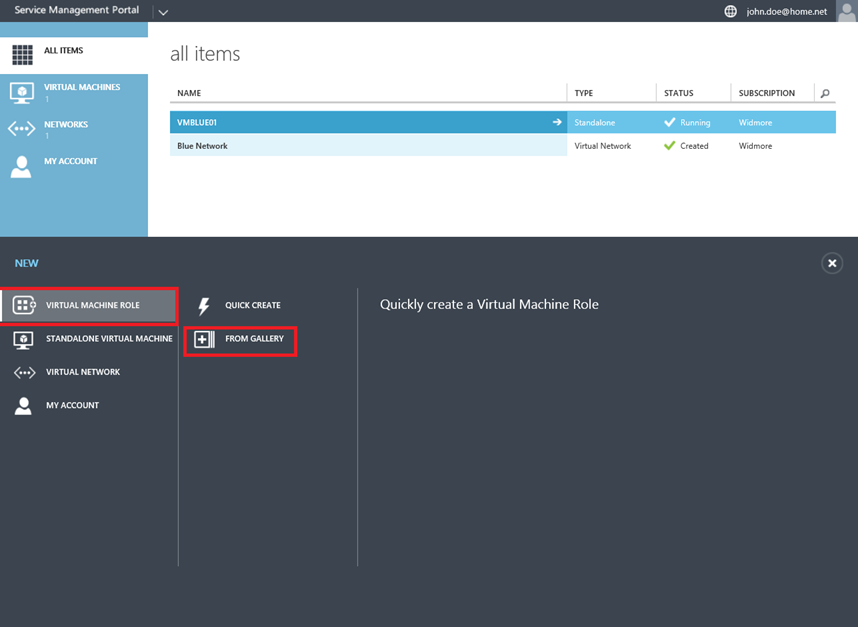
Select the VM role that you want to deploy and click on next. So in this example, I select Domain Controller.

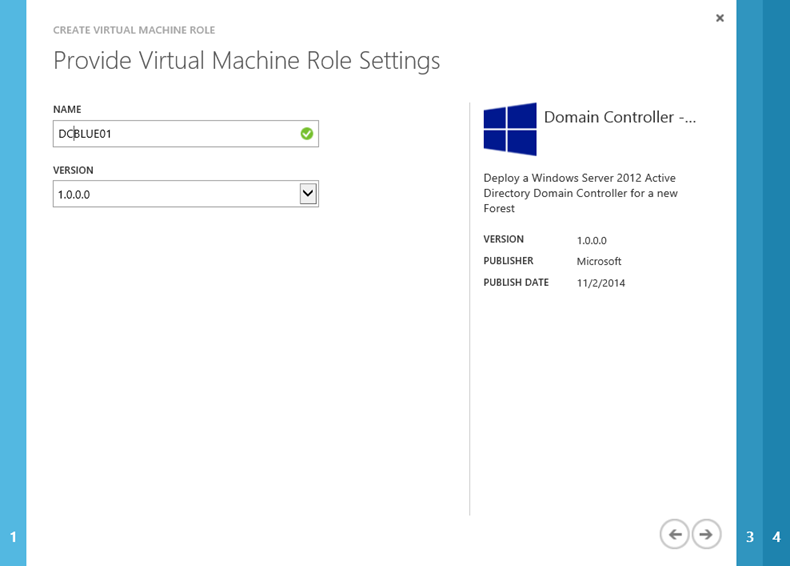
Give a name to your VM role and choose a version. If you update the resource definition, a new version will be available for your tenants.
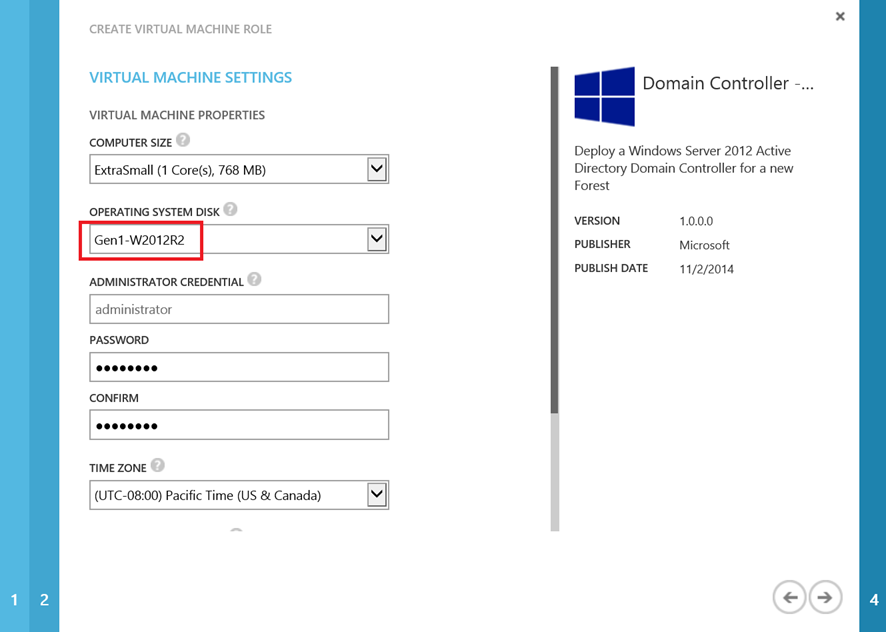
Next, specify the virtual machine settings as computer size, administrator password, network and so on. Moreover in operating system disk, there is the VHDX that we have set above in VMM part.
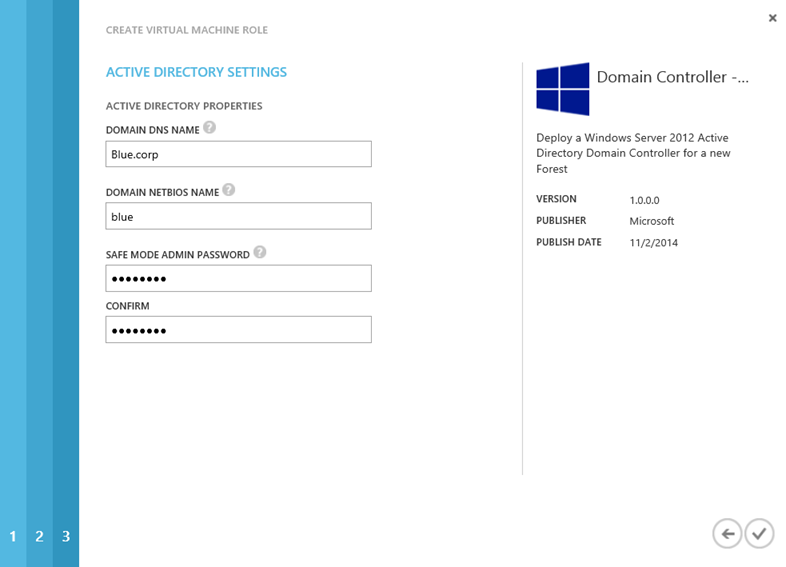
To finish, you have to specify Active Directory Settings. Once you have validated, the VM Role deployment begins.
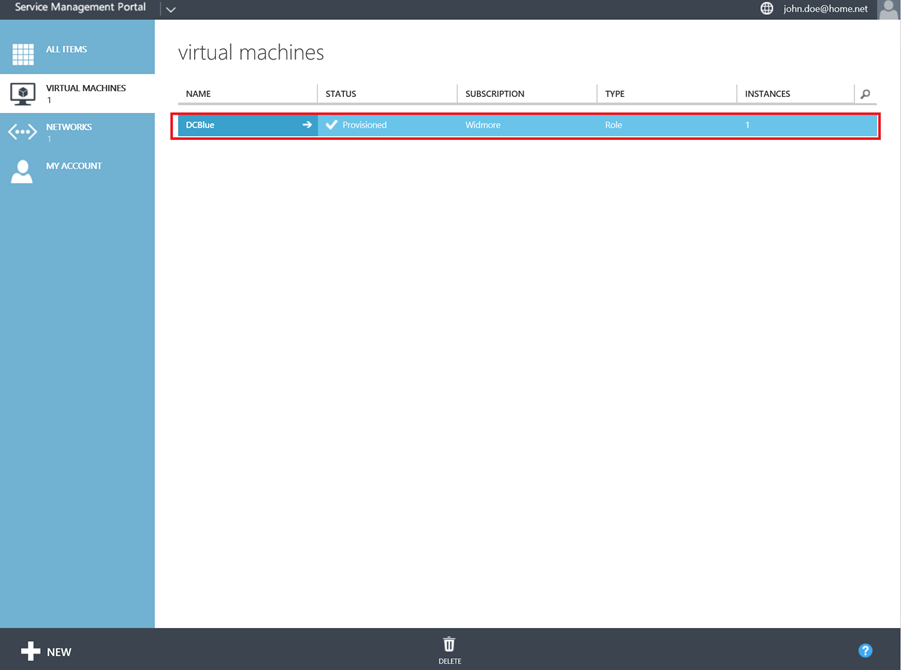
Once the VM Role is provisioned, you should retrieve it in the Virtual Machines tab.
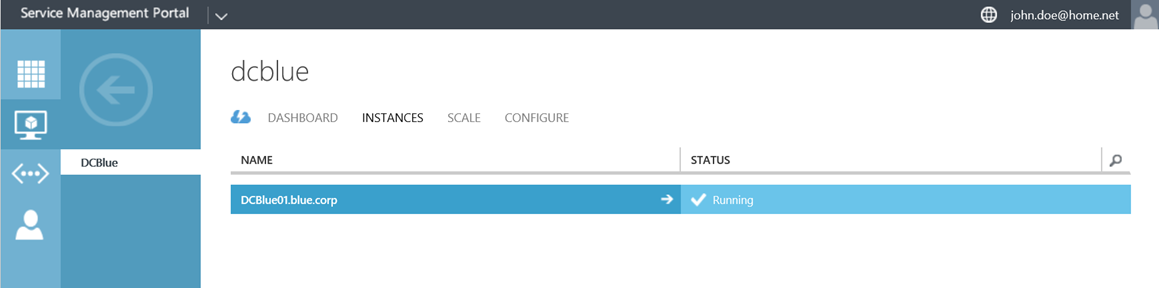
If you navigate to instances tab. Only one VM is a member of the VM Role that you have provisioned.
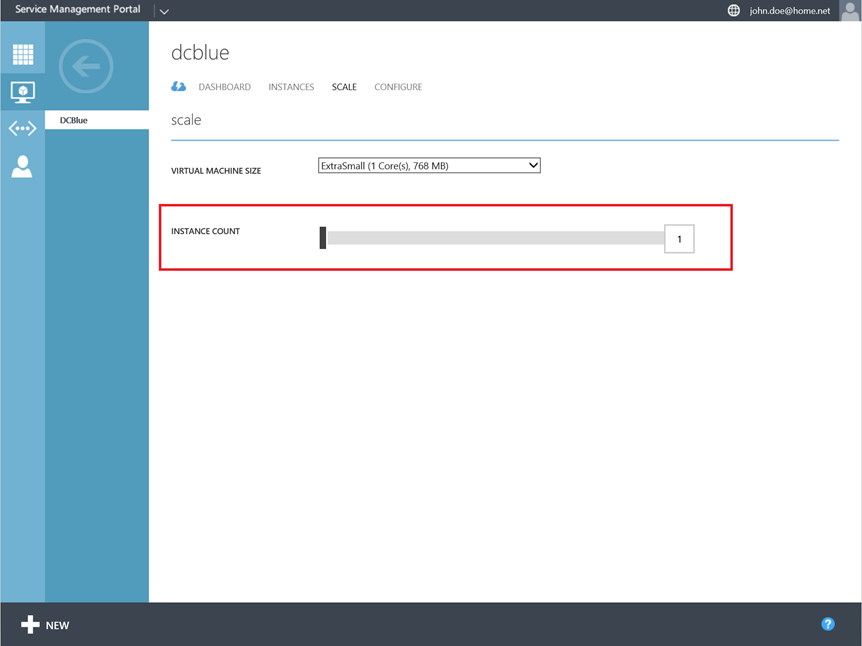
Now if you navigate to Scale tab, you can increase the number of instances in your VM role to ensure High Availability.
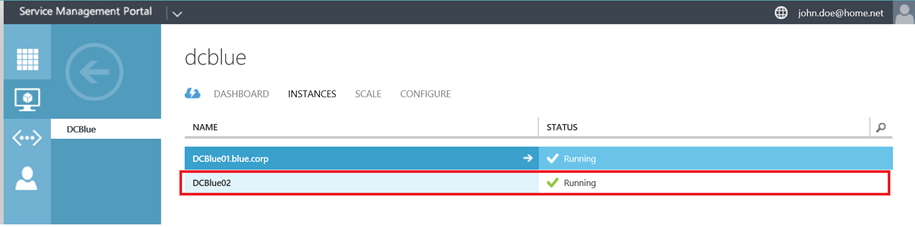
For example, I have set the instance count to 2. So a new virtual machine has been provisioned as below.
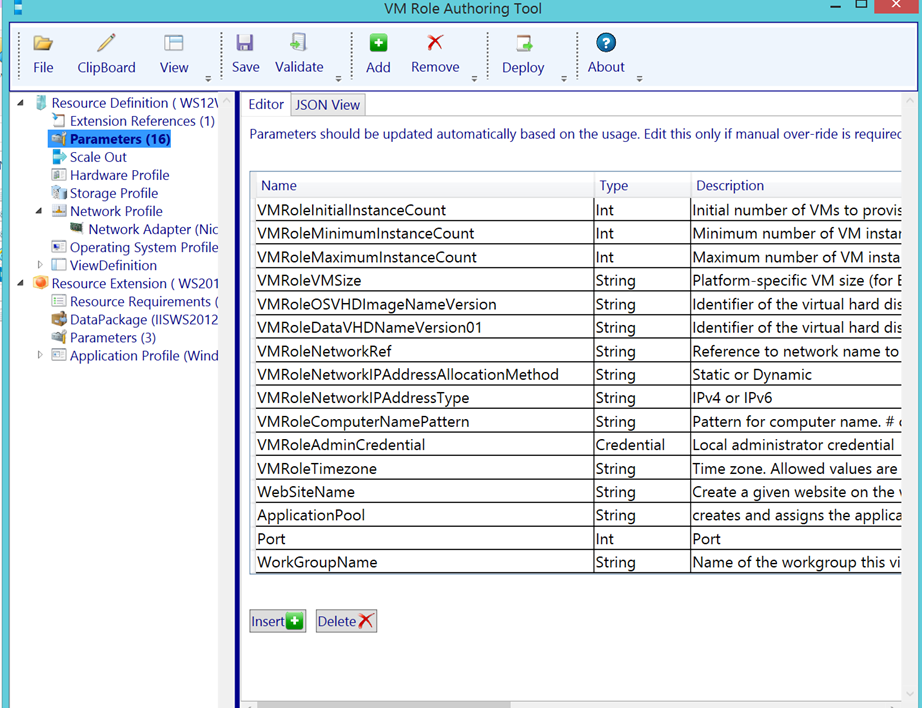
VM Role Authoring Tool
In this topic we have added a VM Role downloaded from Microsoft Web Plateform Installer. However thanks to VM Role Authoring Tool, you can create your own VM Role. I will talk about VM Role Authoring Tool on a next topic.


Hi Romain, I tried the steps you mentioned and everything works like a charm. One thing though. When i request a second VM to be added to the role to scale it, I get another domain controller, standalone on the same domain name. I see no high availability here, I believe it should be added as an additional domain controller. On the contrary, the deployment runs identically, providing a DC for a new domain with the same name…!
Hi,
You need to create a payload (PowerShell script) which check if a forest already exists. If yes, you just add the domain controller to the domain.
Wow! That was quick. Awesome! Is there a guide out there you would suggest for this payload creation and injection?