
As we have seen in a previous post, Windows Azure Pack can be connected to your virtualization infrastructure relying on System Center Virtual Machine Manager. This is Virtual Machine Clouds (VM Clouds) service that enables to connect to your virtualization infrastructure to provide Infrastructure as a Service (IaaS) to your tenants. In addition to manage virtual machines, VM Clouds enables to manage VM networks.
Because Windows Azure Pack is multi-tenants and enables customers to manage their own resources in their clouds, Hyper-V Network Virtualization (HNV) is more interesting than VM networks based on VLAN and his limitations.
More precisely VLAN technology is based on 802.1Q standard that says that each Ethernet frame can be tagged with a maximum of 12bits (0 to 4095 in decimal). So if you use VLAN technology for your multi-tenants infrastructure, only 4096 isolated subnets can be created. To finish, VLAN technology needs a specific configuration on network devices (logical and physical switches and routers).
Network virtualization enables to isolate subnets without using tags and so without network devices configuration. But how it is work?
Hyper-V Network Virtualization
In HNV there are two types of IP addresses:
-
Provider Addresses (PA): These IP addresses are used by virtual machines when the traffic is encapsulated on the provider network;
-
Customer Addresses (CA): These IP addresses are set in Guest OS of VM so that they communicate together is the same subnet.

For example, the VM with the CA 192.168.1.3 wants to communicate with the VM with the CA 192.168.1.4 (in the blue subnet). So the packets are encapsulated and use provider addresses as source and destination addresses. In the encapsulate packets there are the subnet identifier (VSID: Virtual Subnet IDentifier), the mac and customer addresses of VM. In this example, all VMs belong to the same VM Network (192.168.1.0/24) but are isolated in two different subnets (the red and the blue). This allows to use the same address space in each subnet without IP address conflict.
NVGRE Gateway
In the above example, VMs can only communicate with VMs in the same subnet. But usually VMs have to communicate with the physical network to deliver the service. For that a NVGRE (Network Virtualization GRE) gateway has to be deployed. This can be a network device as F5 or a VM with the Remote and Routing Access Service (RRAS). If you choose the VM option, a Hyper-V host has to be dedicated to host the RRAS virtual machines. This part will be approached in a future article.

VM networks in Windows Azure Pack
/!\ In this topic I’m not installing a NVGRE gateway.
Of course it is possible to use a VM network based on VLAN in Windows Azure Pack. This can be done when configuring VM Clouds service in Plans:
But to avoid using VLAN and to let tenants manage their own network subnets, I use HNV. Because Windows Azure Pack relies on System Center Virtual Machine Manager, it is necessary to configure the VMM fabric first. My screenshots are taken from my test lab configuration that contains only one Hyper-V host. This is why I have not a Live Migration or a Hyper-V Replica network.
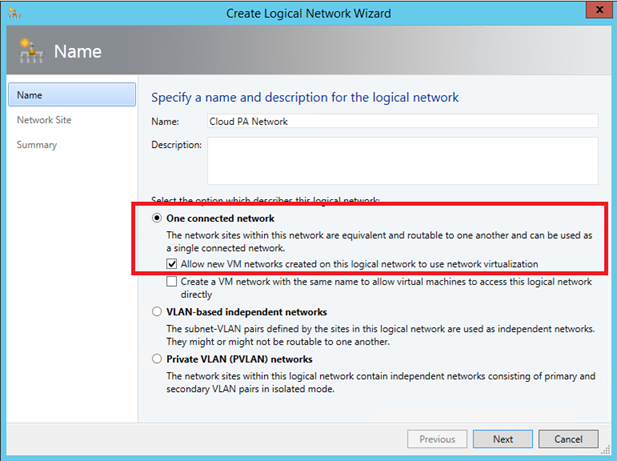
Provider Network creation
In your fabric, navigate to Logical Network and create one. First we create the PA Network. For that select One connected
network and check the box Allow new VM Networks created on this logical network to use network virtualization.
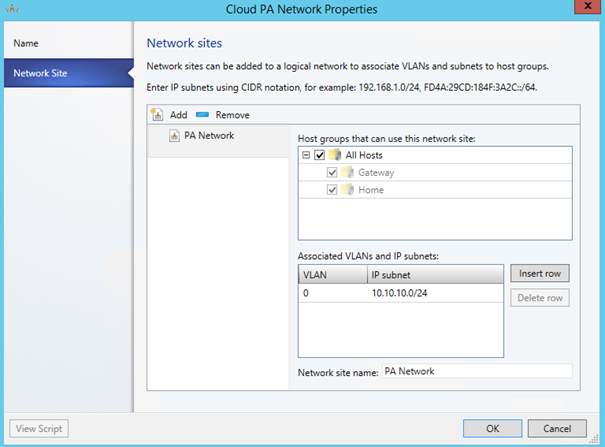
Next specify your network site. My PA network address space is 10.10.10.0/24.
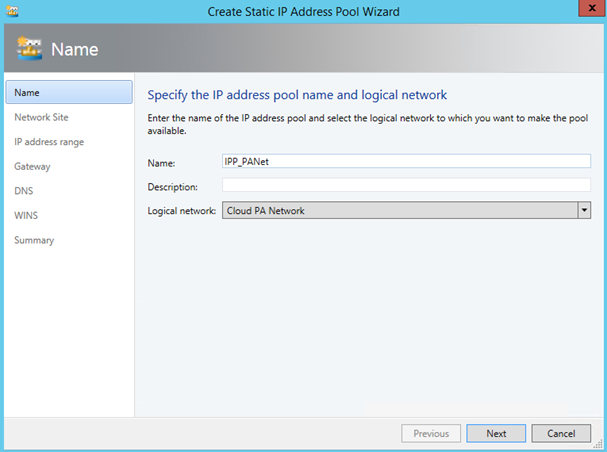
Once your logical network is created, create a static IP Pool:
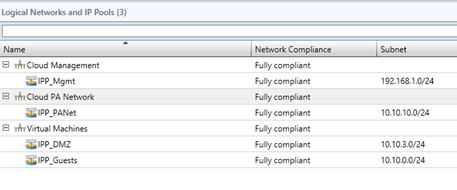
So on my test lab I have these logical networks:
-
Cloud Management: logical network for hyper-V management NIC
-
Cloud PA Network: Logical network for HNV
-
Virtual Machines: logical network for my infrastructure virtual machines.
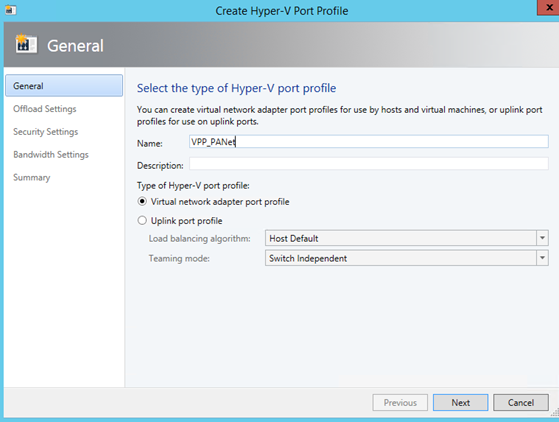
Port profile
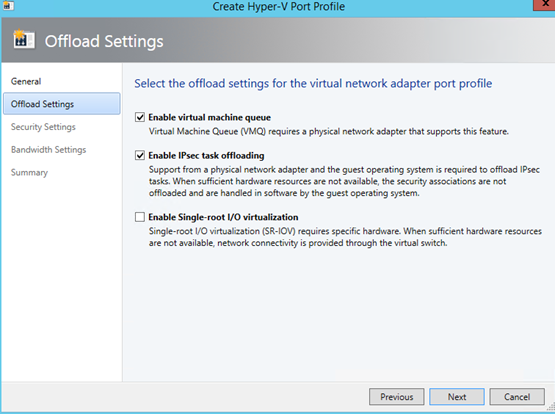
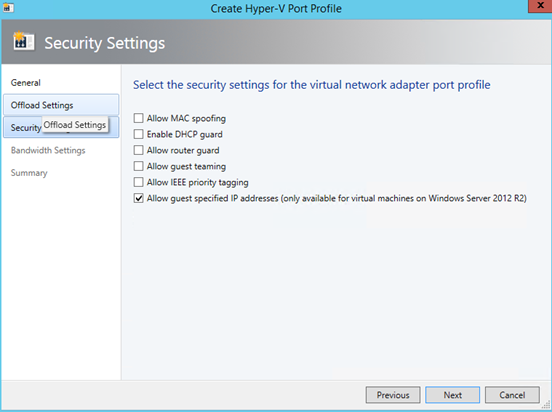
Now that logical networks and IP pools are created, we have to add a Virtual Port Profile (VPP) for the Cloud PA Network. A VPP describes features enabled on vNIC and the QoS.
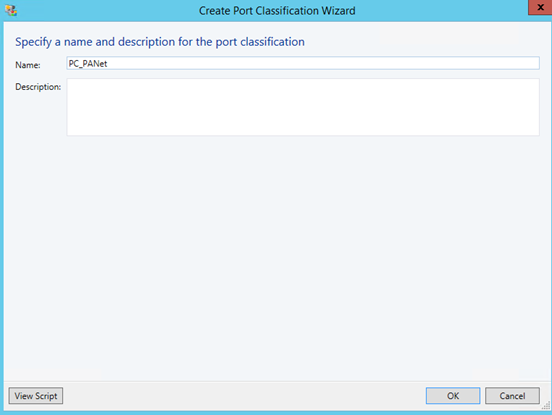
Once the VPP is created, you can add a port classification.
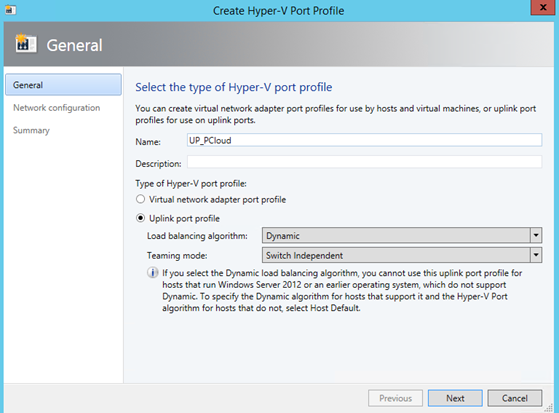
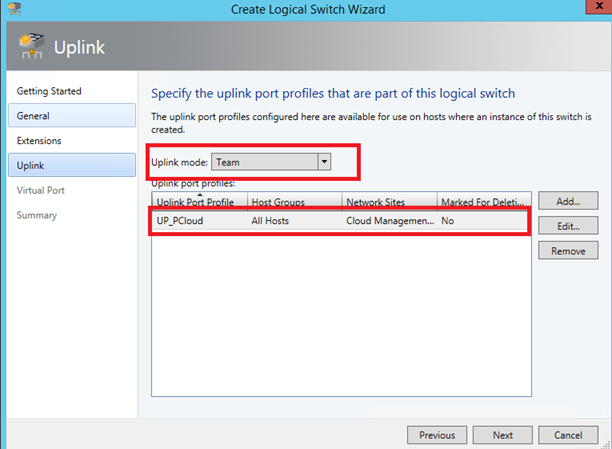
Now we have to create an Uplink Port Profile (UPP). This port profile describes the load balancing and the teaming algorithm. This profile describes also network sites that it supports.

Logical switch
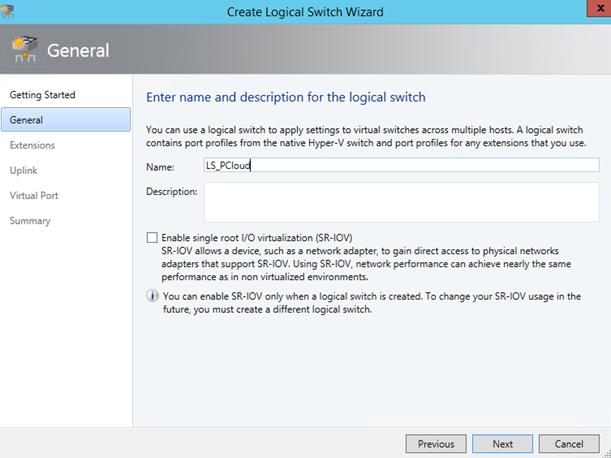
Next we have to configure the logical switch. Give a name to your logical switch and click next.
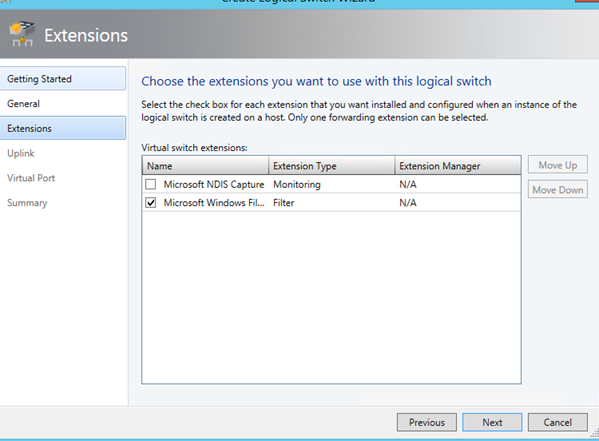
Select virtual switch extension that you need. Usually the configuration is the same as below:
Specify the uplink port profile that is “connected” to your logical switch.
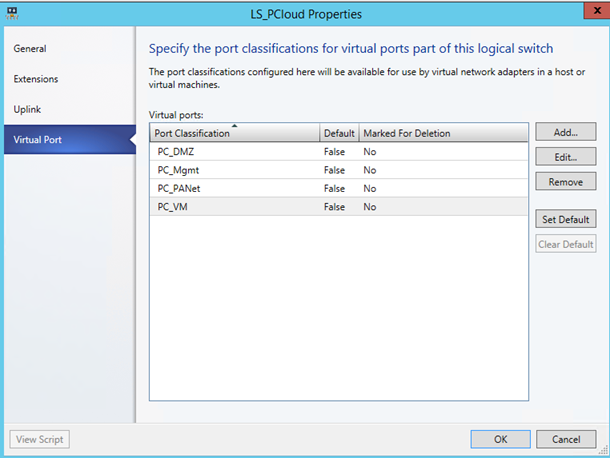
To finish, add virtual port profiles that will be used by VM or hyper-V host.
Hyper-V host configuration
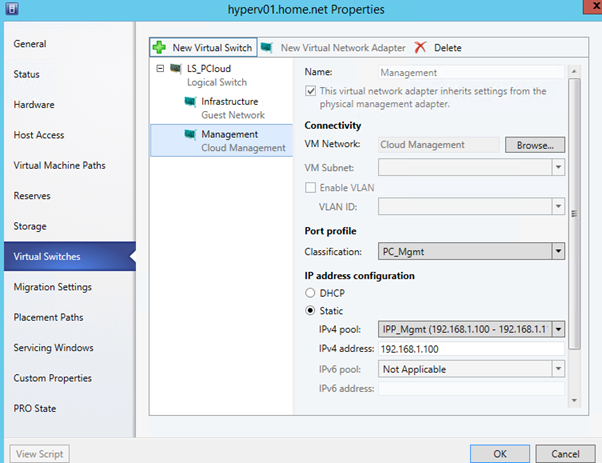
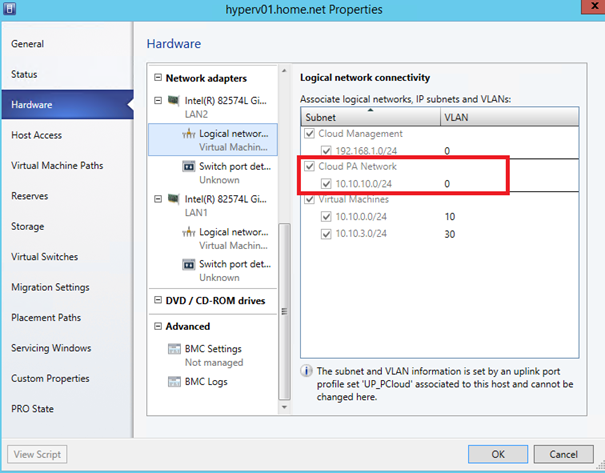
Now that the network fabric is set, open the properties of your Hyper-V hosts. Navigate to Virtual Switches. Create a New Logical Switch and add some vNIC as below configuration:
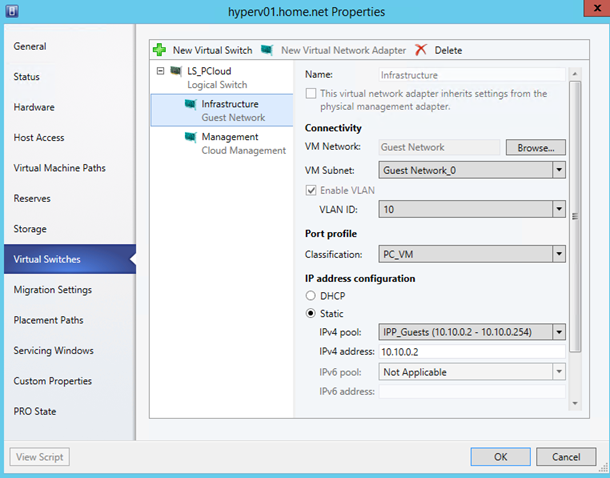
Do not add a vNIC connected to your PA Network. Navigate to hardware and verify that all logical networks are available on your Network adapters:
Add virtual network from Windows Azure Pack
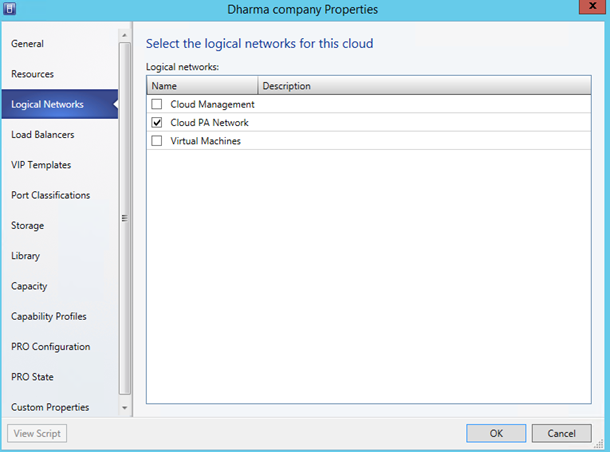
Now that Hyper-V hosts are configured, it is necessary to add the PA network in your VMM cloud:
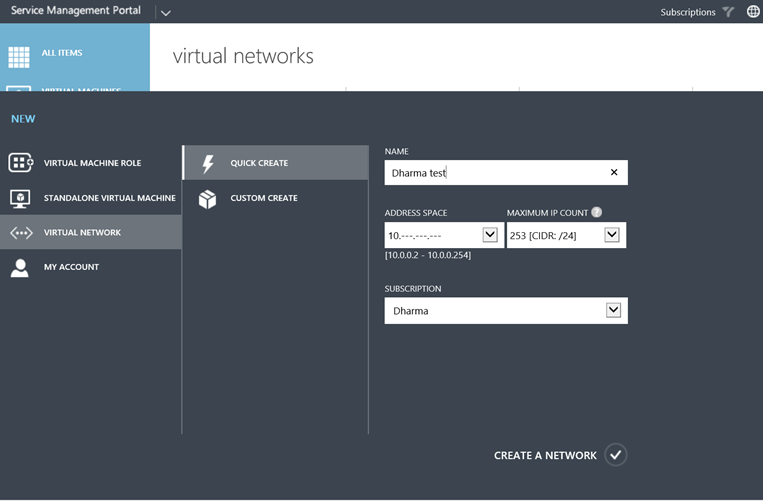
This cloud must be part of a hosting plan in the Windows Azure Pack and a user have to subscribe to this hosting plan. When it is done, you can connect to your tenant Self-Portal and select New > Virtual
Network:
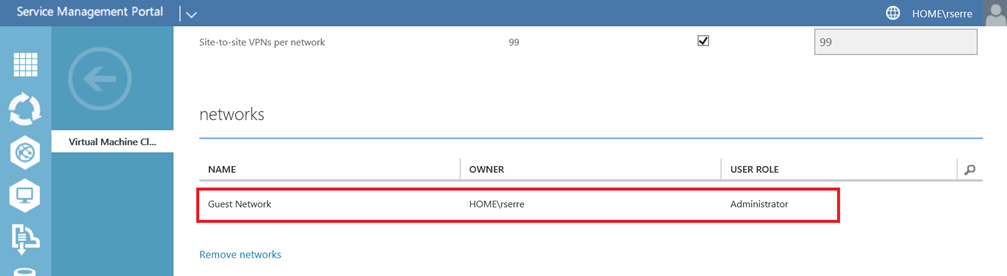
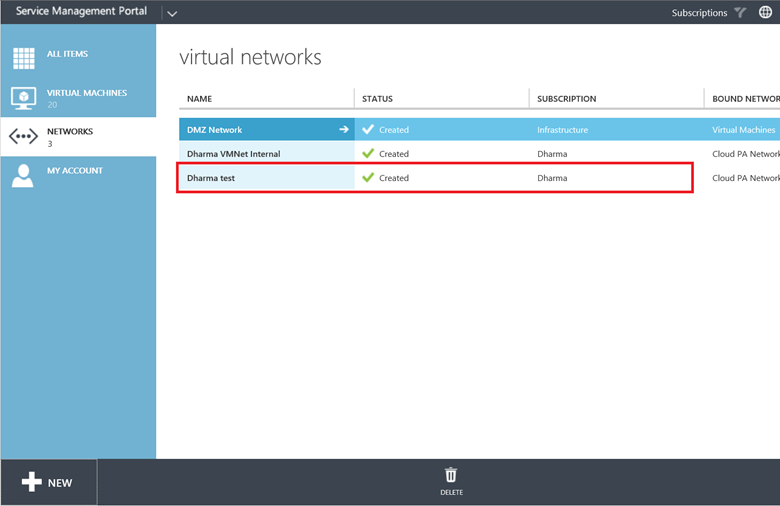
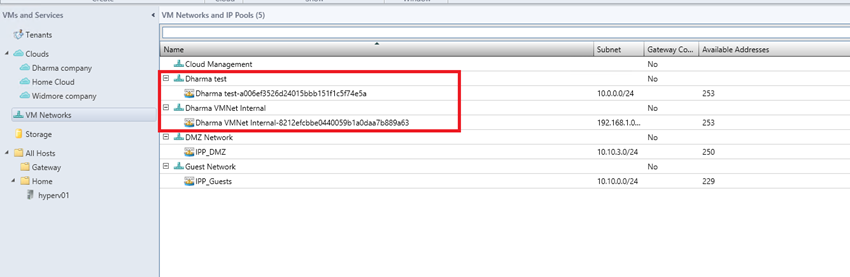
Once it is created you should see it in Networks windows:
In VMM you should have a new VM networks related to your configuration. The static IP Pool is also created.
Checking
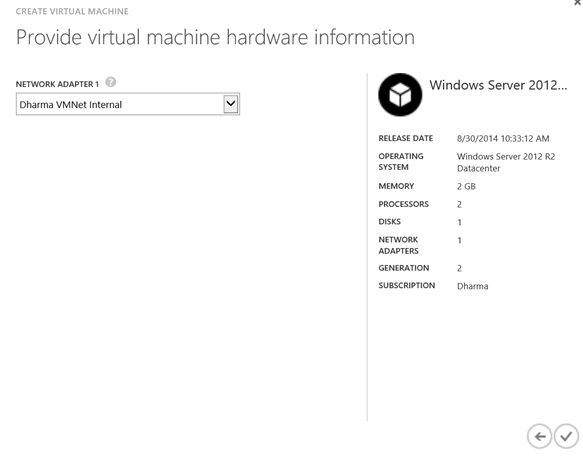
When creating a Virtual Machine from Windows Azure Pack, you should be able to use the VM Network that you have created before:
While my VM is creating, I’m connecting to my Hyper-V host to obtain my Provider IP Address. For that I run Get-NetVirtualizationProviderAddress:
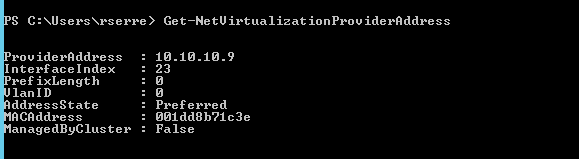
The IP Address of my Hyper-V host on Provider Network is 10.10.10.9. Once the VM is created and started, I run the command Get-NetVirtualizationLookupRecord:
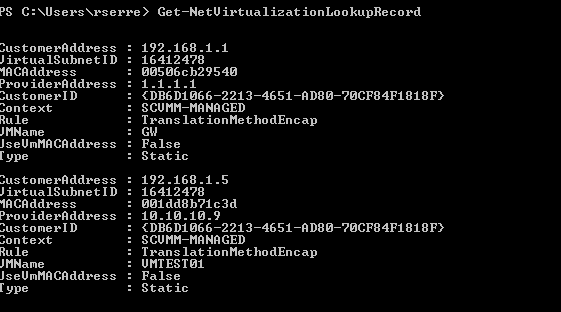
This command shows me two objects. The first contains information about the Gateway while the second is related to my VM called VMTEST01. Before, in Hyper-V network virtualization part, I have talked about the VSID (Virtual Subnet ID). Thanks to the previous command I know that the VSID of this subnet is 16412478.
In this configuration, it is just missing the NVGRE gateway in order to VMTEST01 can communicate with the physical network. Maybe I will work on it on a next topic J (I need a new small Hyper-V host to dedicate the gateway role).


I came across your blog and its very good, I wanted to know if you wanted to tackle something that i have found challenging the Windows Azure Pack Website Cloud. I have not been able to make heads or tale of it.
Hi,
Currently I’m working on Database as a Service on an AlwaysOn database. When it will be done, I certainly will work on Web sites Cloud (in two or three weeks).
Anyway, thank you for your comment 🙂
Great blog! I only have to add that F5 can be deployed as device OR a VM to act as a gateway within an NVGRE deployment