
Veeam Cloud Connect is a solution to store backups and archives in a second datacenter such as Microsoft Azure. Thanks to this technology, we can easily follow the 3-2-1 backup rule (3 backups; 2 different medias; 1 offsite). Last time I talked about Veeam Cloud Connect, I deployed all Veeam roles within a single VM. This time I’m going to deploy the Veeam Cloud Connect in Microsoft Azure where roles are allocated across different Azure VMs. Moreover, some roles such as the Veeam Cloud Gateway will be deployed in a high availability setup.
Before I begin, I’d like to thank Pierre-Francois Guglielmi – Veeam Alliances System Engineer (@pfguglielmi) for his time. Thank you for your review, your English correction and your help.
What is Veeam Cloud Connect
Veeam Cloud Connect provides an easy way to copy your backups to an offsite location that can be based on public cloud (such as Microsoft Azure) or for archival purpose. Instead of investing money in another datacenter to store backup copies, you can choose to leverage Veeam Cloud Connect (VCC) to send these backup copies to Microsoft Azure. VCC exists in the form of two templates that you can find in the Microsoft Azure Marketplace:
- Veeam Cloud Connect for Service Providers
- Veeam Cloud Connect for the Enterprise
The first one is for service providers with several customers who want to deliver Backup-as-a-Service offerings using the Veeam Cloud Connect technology. This provider can deploy the solution in a public cloud and deliver the service to clients. The second version is dedicated to companies willing to build similar Backup-as-a-Service offerings internally, leveraging the public cloud to send backup copies offsite. For this topic, I’ll work on Veeam Cloud Connect for Enterprise, but the technology is the same.
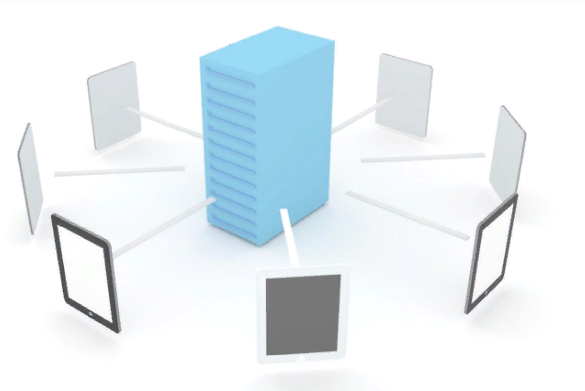
Veeam Cloud Connect is a Veeam Backup & Replication server with Cloud Connect features unlocked by a specific license file. When deploying this kind of solution, you have the following roles:
- Microsoft Active Directory Domain Controller (optional)
- Veeam Cloud Connect server
- Veeam Cloud Gateway
- Veeam backup repositories
- Veeam WAN Accelerator (optional)
Microsoft Active Directory Domain Controller
A Domain controller is not a mandatory role for the Veeam Cloud Connect infrastructure but it can make servers and credentials management easier. If you plan to establish a site-to-site VPN from your on-premises to Microsoft Azure, you can deploy domain controllers within Azure, in the same forest than the existing domain controllers and add all Azure VMs to a domain. In this way, you can use your existing credentials to manage servers, apply existing GPOs and create specific service accounts for Veeam managed by Active Directory. It is up to you: if you don’t deploy a domain controller within Azure, you can still deploy the VCC infrastructure. But then you’ll have to manage servers one by one.
Veeam Cloud Connect server
Veeam Cloud Connect server is a Veeam Backup & Replication server with Cloud Connect features. This is the central point to manage and deploy Veeam Cloud Connect infrastructure components. From this component, you can deploy Veeam Cloud Gateway, WAN accelerator, backup repositories and manage backup copies.
Veeam Cloud Gateway
The Veeam Cloud Gateway component is the entry point of your Veeam Cloud Connect infrastructure. When you’ll choose to send a backup copy to this infrastructure, you’ll specify the public IP or DNS name of the Veeam Cloud Gateway server(s). This service is based on Azure VM(s) running Windows Server and with a public IP address to allow secure inbound and outbound connections to the on-premises environment. If you choose to deploy several Veeam Cloud Gateway servers for high availability, you have two ways to provide a single entry point:
- Round-Robin record in your public DNS registrar; one DNS name for all A records bound to Veeam Cloud Gateways public IP adresses.
- A Traffic Manager in front of all Veeam Cloud Gateway servers
Because Veeam Cloud Gateway has its own load balancing mechanism, you can’t deploy Azure Load balancer, F5 appliance or other kinds of load balancers on front of Veeam Cloud Gateways.
Veeam Backup repositories
This is the storage system that stores backups. It can be a single Windows Server with a single disk or a storage space. Don’t forget that in Azure, the maximum size of a single data disk is 4TB (as of June 2017). You can also leverage the Scale-Out Backup Repository functionality where several backup repositories are managed by Veeam as a single logical repository. To finish, and this is the scenario I’m going to present later in this topic, you can store backups on a Scale-Out File Server based on a Storage Spaces Direct cluster. This solution provides SMB 3.11 access to the storage.
Veeam WAN Accelerator
Veeam WAN accelerator is the same component already available in Veeam Backup & Replication. This service optimizes the traffic between source and destination by sending only new unique blocks not already known at destination. To leverage this feature, you need a pair of WAN Accelerator servers. The source WAN Accelerator creates a digest for data blocks and the target synchronizes these digests and populates a global cache. During next transfer, the source WAN Accelerator compares digests of the blocks in the new incremental backup file with the already known digests. If nothing has changed, the block is not copied over the network and the data is taken from the global cache in the target, or from the target backup repositories, which in such a case act as infinite cache.
Architecture Overview
For this topic, I decided to separate roles on different Azure VMs. I’ll have 5 kinds of Azure VMs:
- Domain Controllers
- Veeam Cloud Gateways
- Veeam Cloud Connect
- Veeam WAN Accelerator
- File Servers (Storage Spaces Direct)

First, I deploy two Domain Controllers to ease management. This is completely optional. All domain controllers are members of an Azure Availability Set.
The Veeam Cloud Gateway servers are located behind a Traffic Manager profile. Each Veeam Cloud Gateway has its own public IP address. The Traffic Manager profile distributes the traffic across public IP addresses of Veeam Cloud Gateway servers. The JSON template provided below allows to deploy from 1 to 9 Cloud Gateway servers depending on your needs. All Veeam Cloud Gateways are added to an Availability Set to support a 99,95% SLA.
Then I deploy two Veeam Cloud Connect VMs: one active and one passive. I add these both Azure VMs in an Availability Set. If the first VM crashes, the backup configuration is restored to the second VM.
The WAN Accelerator is not in an Availability Set because you can add only one WAN Accelerator per tenant. You can deploy as many WAN accelerators as required.
Finally, the backup repository is based on Storage Spaces Direct. I deploy 4 Azure VMs to leverage parity. I choose parity because my S2D managed disks are based on SSD (premium disk). If you want more performance or if you choose standard disks, I recommend you mirroring instead of parity. You can use a single VM to store backups to save money but for this demonstration, I’d like to share with Storage Spaces Direct just to show that it is possible. However, there is one limitation with S2D in Azure: for better performance, managed disks are recommended. An Availability Set with Azure VMs with managed disks supports only three fault domains. That means that in a four-node S2D cluster, two nodes will be in the same fault domain. So there is a chance that two nodes fail simultaneously. But dual parity (or 3-way mirroring) supports two fault domain failures.
Azure resources: Github
I have published in my Github repository a JSON template to deploy the infrastructure described above. You can use this template to deploy the infrastructure for your lab or production environment. In this example, I won’t explain how to deploy the Azure Resources because this template does it automatically.
Active Directory
Active Directory is not mandatory for this kind of solution. I have deployed domain controllers to make management of servers and credentials easier. To configure domain controllers, I started the Azure VMs where domain controller roles will be deployed. In the first VM, I run the following PowerShell cmdlets to deploy the forest:
# Initialize the Data disk
Initialize-Disk -Number 2

#Create a volume on disk
New-Volume -DiskNumber 2 -FriendlyName Data -FileSystem NTFS -DriveLetter E

#Install DNS and ADDS features
Install-windowsfeature -name AD-Domain-Services, DNS -IncludeManagementTools

# Forest deployment
Import-Module ADDSDeployment
Install-ADDSForest -CreateDnsDelegation:$false `
                   -DatabasePath "E:\NTDS" `
                   -DomainMode "WinThreshold" `
                   -DomainName "VeeamCloudConnect.net" `
                   -DomainNetbiosName "HOMECLOUD" `
                   -ForestMode "WinThreshold" `
                   -InstallDns:$true `
                   -LogPath "E:\NTDS" `
                   -NoRebootOnCompletion:$false `
                   -SysvolPath "E:\SYSVOL" `
                   -Force:$true
Then I run these cmdlets for additional domain controllers:
# Initialize data disk
Initialize-Disk -Number 2

# Create a volume on disk
New-Volume -DiskNumber 2 -FriendlyName Data -FileSystem NTFS -DriveLetter E

# Install DNS and ADDS features
Install-windowsfeature -name AD-Domain-Services, DNS -IncludeManagementTools

# Add domain controller to forest
Import-Module ADDSDeployment
Install-ADDSDomainController -NoGlobalCatalog:$false `
                             -CreateDnsDelegation:$false `
                             -Credential (Get-Credential) `
                             -CriticalReplicationOnly:$false `
                             -DatabasePath "E:\NTDS" `
                             -DomainName "VeeamCloudConnect.net" `
                             -InstallDns:$true `
                             -LogPath "E:\NTDS" `
                             -NoRebootOnCompletion:$false `
                             -SiteName "Default-First-Site-Name" `
                             -SysvolPath "E:\SYSVOL" `
                             -Force:$true
Once the Active Directory is ready, I add each Azure VM to the domain by using the following cmdlet:
Add-Computer -Credential homecloud\administrator -DomainName VeeamCloudConnect.net -Restart
Configure Storage Spaces Direct
I have written several topics on Tech-Coffee about Storage Spaces Direct. You can find for example this topic or this one. These topics are more detailed about the Storage Spaces Direct if you need more information.
To configure Storage Spaces Direct in Azure, I started all file servers VMs. Then in each VM I ran the following cmdlet:
# Rename vNIC connected in Internal subnet by Management
rename-netadapter -Name "Ethernet 3" -NewName Management

# Rename vNIC connected in cluster subnet by cluster
rename-netadapter -Name "Ethernet 2" -NewName Cluster

# Disable DNS registration for cluster vNIC
Set-DNSClient -InterfaceAlias *Cluster* -RegisterThisConnectionsAddress $False

# Install required features
Install-WindowsFeature FS-FileServer, Failover-Clustering -IncludeManagementTools -Restart
Once you have run these commands on each server, you can deploy the cluster:
# Validate cluster prerequisites
Test-Cluster -Node AZFLS00, AZFLS01, AZFLS02, AZFLS03 -Include "Storage Spaces Direct",Inventory,Network,"System Configuration"

#Create the cluster
New-Cluster -Node AZFLS00, AZFLS01, AZFLS02, AZFLS03 -Name Cluster-BCK01 -StaticAddress 10.11.0.160

# Set the cluster quorum to Cloud Witness (choose another Azure location)
Set-ClusterQuorum -CloudWitness -AccountName StorageAccount -AccessKey "AccessKey"

# Change the CSV cache to 1024MB per CSV
(Get-Cluster).BlockCacheSize=1024

# Rename network in the cluster
(Get-ClusterNetwork "Cluster Network 1").Name="Management"
(Get-ClusterNetwork "Cluster Network 2").Name="Cluster"

# Enable Storage Spaces Direct
Enable-ClusterS2D -Confirm:$False

# Create a volume and rename the folder Volume1 to Backup
New-Volume -StoragePoolFriendlyName "*Cluster-BCK01*" -FriendlyName Backup -FileSystem CSVFS_ReFS -ResiliencySettingName parity -PhysicalDiskRedundancy 2 -Size 100GB
Rename-Item C:\ClusterStorage\Volume1 Backup
new-item -type directory C:\ClusterStorage\Backup\HomeCloud
Then open the Active Directory console (dsa.msc) and edit the permissions of the OU where the Cluster Name Object is located. Grant the permission to create computer objects to the CNO (in the example Cluster-BCK01) on the OU.

Next, run the following cmdlets to complete the file server’s configuration:
# Add Scale-Out File Server to cluster
Add-ClusterScaleOutFileServerRole -Name BackupEndpoint

# Create a share
New-SmbShare -Name 'HomeCloud' -Path C:\ClusterStorage\Backup\HomeCloud -FullAccess everyone
First start of the Veeam Cloud Connect VM
First time you connect to the Veeam Cloud Connect VM, you should see the following screen. Just specify the license file for Veeam Cloud Connect and click Next. The next screen shows the requirements to run a Veeam Cloud Connect infrastructure.

Deploy Veeam Cloud Gateway
First component I deploy is Veeam Cloud Gateway. In the Veeam Backup & Replication console (in the Veeam Cloud Connect VM), you can navigate to Cloud Connect. Then select Add Gateway.

In the first screen, just click on Add New…

Then specify the name of the first gateway and provide a description.

In the next screen, enter credentials that have administrative permissions in the Veeam Cloud Gateway VM. For that, I created an account in Active Directory and I added it to local administrators of the VM.

Then Veeam tells you that it has to deploy a component on the target host. Just click Apply.

The following screen shows a successful deployment:

Next you have a summary of the operations applied to the target server and what has been installed.

Now you are back to the first screen. This time select the host you just added. You can change the external port. For this test I kept the default value.

Then choose “This server is located behind NAT” and specify the public IP address of the machine. You can find this information in the Azure Portal on the Azure VM blade. Here again I left the default internal port.

This time, Veeam tells you that it has to install Cloud Gateway components.

The following screenshot shows a successful deployment:

Repeat these steps for each Cloud Gateway. In this example, I have two Cloud Gateways:

To complete the Cloud Gateway configuration, open up the Azure Portal and edit the Traffic Manager profile. Add an endpoint for each Cloud Gateway you deployed and select the right public IP address. (Sorry I didn’t find how to loop the creation of endpoint in JSON template).

Because I have two Cloud Gateways and so two Traffic Manager endpoints with the same weight.

Add the backup repository
In this step, we add the backup repository. Open the Veeam Backup & Replication console (in Veeam Cloud Connect VM) and navigate to Backup Infrastructure. Then select Add Repository.

Enter a name and a description for your backup repository.

Next select Shared folder because Storage Spaces Direct with SOFS is based on … shared folder.

Then specify the UNC path to the share that you have previously created (Storage Spaces Direct section) and provide credentials with privileges.

In the next screen you can limit the maximum number of concurrent tasks, the data rates and set some advanced parameters.

Then I choose to not enable vPower NFS because it’s only use in VMware vSphere environments.

The following steps are not mandatory. I just clean up the default configuration. First I remove the default tenant.

Then I change the Configuration Backup task’s repository to the one created previously. For that I navigate to Configuration Backup:

Then I specify that I want to store the configuration backups to my S2D cluster. It is highly recommended to encrypt configuration backup to save credentials

Finally, I remove the default backup repository.

Deploy Veeam WAN Accelerator (Optional)
To add a Veeam WAN Accelerator, navigate to Backup Infrastructure and select Add WAN Accelerator.

In the next screen, click Add New…

Specify the FQDN of the target host and type in a description.

Then select credentials with administrative permissions on the target host.

In the next screen, Veeam tells you that a component has to be installed.

This screen shows a successful deployment.

Next you have a summary screen which provides a summary of the configuration of the target host.

Now you are back to the first screen. Just select the server that you just added and provide a description. I choose to leave the default traffic port and the number of streams.

Select a cache device with enough capacity for your needs.

Finally you can review your settings. If all is ok, just click Apply.

You can add as many WAN accelerators as needed. One WAN Accelerator can used by several tenants. Only one WAN Accelerator can be bound to a tenant.

Prepare the tenant
Now you can add a tenant. Navigate to Cloud Connect tab and select Add tenant.

Provide a user name, a password and a description to your tenant. Then choose Backup storage (cloud backup repository).

In the next screen you can define the maximum number of concurrent tasks and a bandwidth limit.

Then click Add to bind a backup repository to the tenant.

Specify the cloud repository name, the backup repository, the capacity of the cloud repository and the WAN Accelerator.

Once the cloud repository is configured, you can review the settings in the last screen.

Now the Veeam Cloud Connect infrastructure is ready. The enterprise can now connect to Veeam Cloud Connect in Azure.
Connect On-Premises to Veeam Cloud Connect
To connect to the Veeam Cloud Connect infrastructure from On-Premises, open your Veeam Backup & Replication console. Then in Backup infrastructure, navigate to Service Providers. Click Add Service Provider.

Type in the FQDN to your Traffic Manager profile and provide a description. Select the external port your chose for the Veeam Cloud Gateways configuration (I left mine to the default 6180).

In the next screen, enter the credentials to connect to your tenant.

If the credentials are correct, you should see the available cloud repositories.


Now you can create a backup copy job to Microsoft Azure.

Enter a job name and description and configure the copy interval.

Add virtual machine backups to copy to Microsoft Azure and click Next.

In the next screen you can set archival settings and how many restore points you want to keep. You can also configure some advanced settings.

If you a WAN Accelerator on-premises, you can select the source WAN Accelerator.

Then you can configure scheduling options for the backup copy job.

When the backup copy job configuration is complete, the job starts and you should see backup copies being created in the Veeam Cloud Connect infrastructure.
Conclusion
This topic introduces “a large” Veeam Cloud Connect infrastructure within Azure. All components can be deployed in a single VM (or two) for small environments or as described in this post for huge infrastructure. If you have several branch offices and want to send backup data to an offsite location, it can be the right solution instead of tape library.


Hello,
Thanks for the information
Can you explain two points ?
The first : Domain name
you just need to register the 2 fixed ip of the gateway servers on the registrar ?
Example :
Name of registrar :
veeam.example.com
Ip public gateway 01 : 10.10.0.1
Ip public gateway 02 : 10.10.0.2
in registrar Typa A
veeam.example.com — A — 10.10.0.1
veeam.example.com — A — 10.10.0.2
And we use Endpoint Weight 1 for both
That seems right for you ?
The second : backup Repositories
Is it interesting to use a storage account with one blob per client?
thanks for everything